Ready to jump into Bitcoin? The first thing you'll need is a wallet. Getting one is easier than you might think—you just pick a wallet type, get it set up, and make sure to back up your recovery phrase.
This gives you a secure home base to store, send, and receive Bitcoin, putting you in the driver's seat of your own digital finances.
Your First Step Into Bitcoin Wallets
Before we get into the nitty-gritty, let's clear up what a Bitcoin wallet actually is. It doesn't hold your coins like a physical wallet holds cash. Instead, a wallet is an app or a device that manages your secret keys, letting you talk to the Bitcoin network. Think of it as your personal remote control for the entire Bitcoin ecosystem.
This is where you'll hear the term self-custody thrown around. It’s the core idea behind Bitcoin: you are in complete control of your own money. Unlike a bank, which can freeze your account, a non-custodial Bitcoin wallet means only you have the keys to the vault. You are your own bank.
The Core Components of a Wallet
Every Bitcoin wallet, no matter the type, boils down to two critical pieces of information:
- Public Key: This is what generates your Bitcoin addresses. A Bitcoin address is like an email address or bank account number—it’s totally safe to share with people who want to send you Bitcoin. We cover this in more detail in our guide on Bitcoin addresses.
- Private Key: This is the master key to your funds. It’s a secret code that proves you own the Bitcoin at your addresses and is used to approve any transactions you send. Never, ever share your private key with anyone.
Thankfully, setting up a wallet isn't the complex, code-heavy process it used to be. Modern wallets use simple, user-friendly steps and security features like seed phrases, which are basically human-readable backups of your private key.
This push for simplicity is no surprise when you see how fast crypto is growing. Today, nearly 28% of American adults own some form of cryptocurrency, and Bitcoin remains the top dog.
At the end of the day, remember this: Your Bitcoin is only as secure as your private key. The wallet's main job is to keep that key safe while giving you an easy way to manage your funds.
Learning to create and manage a wallet is your ticket to participating in a new kind of financial system. In the sections ahead, we’ll walk through the different types of wallets and help you pick the right one to start your journey with confidence.
Quick Guide to Bitcoin Wallet Types
Choosing the right wallet can feel overwhelming with all the options out there. To simplify things, here's a quick breakdown of the main types to help you decide which one best fits your needs.
| Wallet Type | Best For | Security Level | Convenience |
|---|---|---|---|
| Mobile/Desktop | Daily use, quick transactions, beginners | Good | High |
| Hardware Wallet | Long-term holding, large amounts | Excellent | Medium |
| Paper Wallet | Deep cold storage, gifting | High (if done right) | Low |
| Exchange Wallet | Trading, buying/selling quickly | Fair (Custodial) | Very High |
This table should give you a solid starting point. As you get more comfortable, you might even find yourself using a combination of these—like a mobile wallet for everyday spending and a hardware wallet for your long-term savings.
Choosing the Right Bitcoin Wallet for You
Picking the right Bitcoin wallet is probably the single most important decision you'll make when getting started. Your choice boils down to one simple question: what are you using Bitcoin for? Are you planning on making frequent, small transactions, or are you looking to lock away a serious amount for the long haul?
Answering that is your first real step. A wallet built for daily use needs to be convenient, while a wallet for long-term savings has to prioritize security above everything else. It’s like the difference between your everyday checking account and a fortified vault for your life savings—you wouldn't use the same tool for both.
This little flowchart helps visualize which path makes the most sense for you.
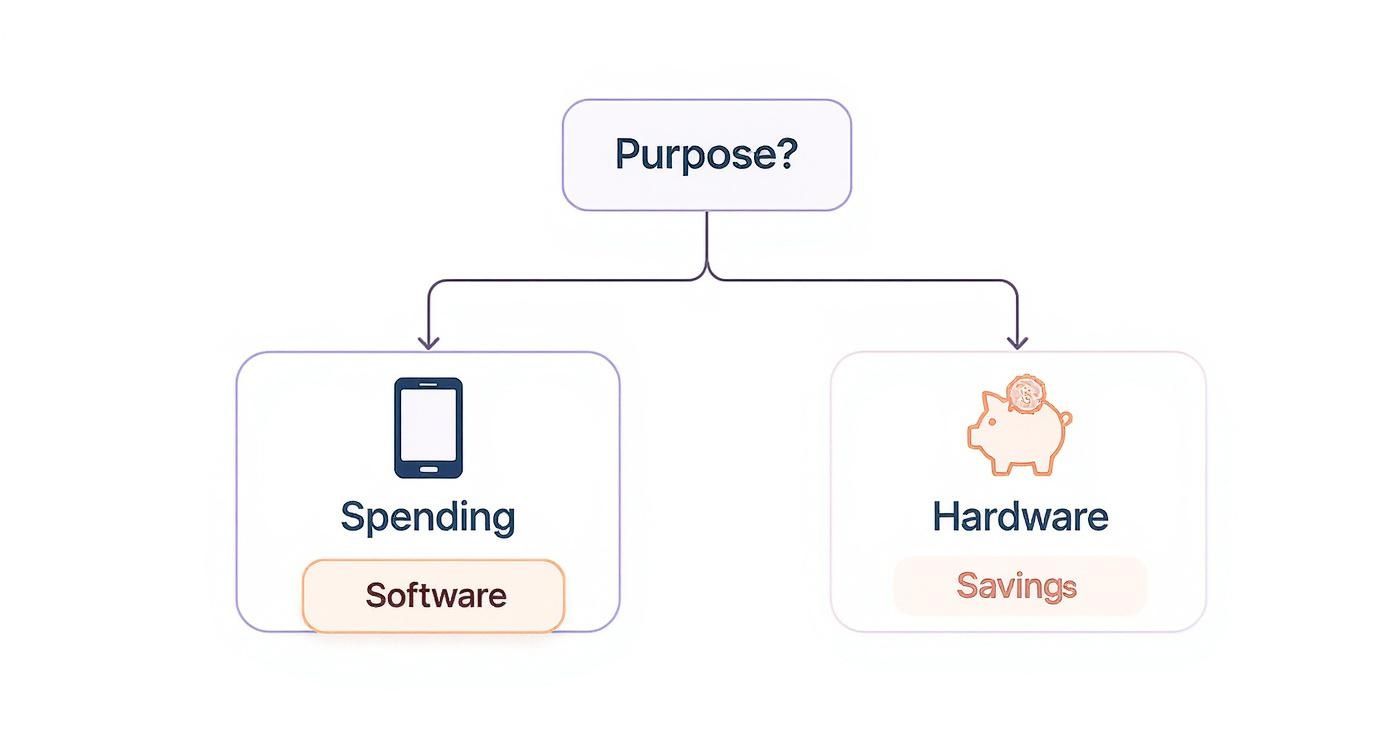
As you can see, your intention—spending versus saving—is the key. It points you directly to the right category of wallet and cuts through a lot of the initial confusion.
Software Wallets for Everyday Use
If you plan on using Bitcoin for regular payments, trading, or just moving it around, a software wallet is your best friend. These are just applications you install on your phone or computer, giving you a great mix of convenience and security for daily stuff. We often call these "hot wallets" because they're connected to the internet.
- Mobile Wallets: Think apps on your smartphone, like BlueWallet or Muun. They are perfect for on-the-go spending and often have QR code scanners that make sending and receiving Bitcoin as easy as taking a picture.
- Desktop Wallets: These are programs for your laptop or desktop, like Electrum or Sparrow Wallet. They usually come packed with more advanced features than mobile apps, making them a solid choice for power users managing funds from a main computer.
Because they live online, software wallets carry a bit more risk than offline options. But for managing smaller, spendable amounts of Bitcoin, you just can't beat their ease of use.
Hardware Wallets for Maximum Security
When your focus shifts from spending to serious long-term saving, security becomes non-negotiable. This is where hardware wallets absolutely dominate. These are small, physical devices that store your private keys completely offline, making them basically immune to online threats like malware or hackers.
A hardware wallet signs transactions internally, so your private keys never even touch your internet-connected device. It’s a powerful layer of protection for your funds. Companies like Ledger and Trezor are the titans of this space. They do require a small upfront investment, but the peace of mind they provide for storing significant value is priceless.
For a deeper dive, you can explore our detailed guide on what a hardware wallet is to really understand the mechanics.
Here's a pro tip: Most experienced Bitcoiners use both. They keep a mobile wallet for "pocket money" and a hardware wallet for their main savings. This gives you the best of both worlds—convenience for daily life and fortress-like security for your long-term holdings.
Custodial Wallets on Exchanges
When you buy Bitcoin on an exchange like vTrader, your coins initially sit in a custodial wallet. This just means the exchange is managing the private keys for you. It’s incredibly convenient for beginners and active traders since it makes buying, selling, and trading a seamless experience.
But that convenience comes with a trade-off: you aren't in full control. The old crypto mantra, "not your keys, not your coins," is a perfect fit here. While exchanges have robust security, you're ultimately trusting a third party to protect your assets.
For this reason, many people use exchange wallets for active trading but transfer their long-term holdings to a non-custodial wallet (software or hardware) where they have the final say.
Before we move on, let's break down the key differences between these wallet types. This table should make it crystal clear.
Bitcoin Wallet Comparison Software vs Hardware vs Custodial
| Feature | Software Wallet (e.g., BlueWallet) | Hardware Wallet (e.g., Ledger) | Custodial Wallet (e.g., vTrader) |
|---|---|---|---|
| Security | Good (but online) | Excellent (offline) | Good (depends on exchange) |
| Control | Full Control (You hold keys) | Full Control (You hold keys) | No Control (Exchange holds keys) |
| Ease of Use | Excellent | Good (some setup needed) | Excellent |
| Cost | Free | $60 – $200+ | Free (trading fees apply) |
| Best For | Daily spending, small amounts | Long-term savings, large amounts | Trading, buying/selling |
This comparison really highlights the trade-offs. You're balancing security, control, and convenience. For a beginner, starting with a custodial wallet on an exchange like vTrader is often the easiest entry point, but the goal should always be to eventually take self-custody of your long-term savings with a dedicated hardware or software wallet.
Paper Wallets A Legacy Option
A paper wallet is exactly what it sounds like: a physical document with your public and private keys printed on it, usually as QR codes. While they offer true offline storage, they're now seen as an outdated and pretty risky way to store Bitcoin.
They are incredibly vulnerable to physical damage (fire, water, or just tearing) and are surprisingly tricky to use securely without accidentally exposing your private keys online. Modern hardware wallets give you far better security with much less hassle, making paper wallets an impractical choice today.
The move away from paper wallets is part of a larger trend. User-friendly and secure options have exploded in popularity as more people enter the space. Globally, over 200 million Bitcoin wallets have been created, and around 64 million of them are actively holding a balance. This tells you that digital and hardware solutions, which offer both top-tier security and real-world accessibility, are what people actually want to use.
Setting Up Your First Software Wallet
Alright, you've got the lay of the land on wallet types. Now it's time to roll up your sleeves and get one set up. The easiest entry point for almost everyone is a software wallet—it hits that sweet spot between security and real-world usability.
For this walkthrough, we’ll focus on setting up a mobile wallet. They're incredibly intuitive and perfect for managing your first Bitcoin without being overwhelming. The fundamentals we'll cover—downloading, wallet creation, and securing your backup—are pretty much universal, whether you're on your phone or a desktop.
Let's dive in and mint your very first Bitcoin wallet.
Finding and Installing a Trusted Wallet App
First things first: choosing a wallet and installing it without falling into a trap. This step is far more critical than it sounds because the app stores are littered with malicious fakes designed to drain your funds the moment you send them.
Here’s how to do it safely:
- Start at the Source: Always begin by visiting the official website of a well-regarded wallet. Think BlueWallet or Muun. Never, ever trust links from random tweets, DMs, or forum posts.
- Use Their Official Links: On the official site, look for the direct links to the Apple App Store or Google Play Store. This is your only guarantee you're getting the legitimate app, not a convincing clone.
- Install and Prepare: Download and install the app like you would any other.
Once it's installed, find a private space where you can focus for a few minutes. You don’t want anyone looking over your shoulder for this next part.
The Wallet Creation and Backup Process
When you launch the app, you’ll be prompted to "Create a new wallet." As soon as you tap that button, the software generates your unique private keys in the background—this is the cryptographic core of your wallet.
Now for the most important part of this entire guide: the recovery phrase. You’ll also see it called a seed phrase. This is a list of 12 or 24 simple words that acts as the master key to your Bitcoin. If your phone gets lost, fried, or stolen, this phrase is the only thing that can bring your funds back on a new device.
Critical Security Warning: Treat your recovery phrase like it's a bar of gold. Anyone who finds these words can access and steal your Bitcoin. There is no "forgot password" link. No customer support line to call. You are 100% responsible.
The app will display your phrase. Follow these rules without exception:
- Write It Down on Paper: Grab a pen and paper. Write down each word in the correct order, numbering them 1 to 12 (or 24).
- No Digital Copies. Period: Do not take a screenshot. Don't save it in a notes app, email it to yourself, or store it in a password manager. Any digital copy is a target for hackers.
- Verify the Backup: The app will then quiz you by asking you to re-enter the words. This isn’t just busywork; it confirms you wrote them down correctly. Double-check your spelling and order.
Once you’ve confirmed the backup, that’s it. Your wallet is live. You'll be brought to the main dashboard, which will show a zero balance and give you options to send and receive.
Understanding Your New Wallet Interface
Your new wallet is pretty straightforward. For now, the most important feature is your receiving address. This is a long string of alphanumeric characters that you give to someone to get paid in Bitcoin. To get a feel for them, you can check out a detailed wallet address example and see what different formats look like.
Think of it like this:
- Receive Button: Tapping this shows a QR code and your Bitcoin address. This is public info you can share freely.
- Send Button: When you eventually have Bitcoin, this is where you'll go to send it to someone else.
- Balance Display: This is where you'll see your Bitcoin holdings.
Desktop wallets work almost identically. The main difference is that you download the software directly from the official website, but the security principles—especially concerning that all-important recovery phrase—are exactly the same.
You’ve now successfully created a non-custodial Bitcoin wallet, giving you full control over your digital assets. The next step is figuring out how to store that piece of paper with your recovery phrase on it for the long haul.
How to Secure Your Bitcoin Recovery Phrase
When you set up a new Bitcoin wallet, it gives you a list of 12 or 24 words. This isn’t just some random assortment of words; it’s your recovery phrase, often called a seed phrase. Think of it as the ultimate master key to every bitcoin your wallet ever holds. If you lose your phone or your hardware wallet gets destroyed, this phrase is the only thing that will get your funds back.
Securing this phrase isn't just a friendly suggestion—it's the single most critical responsibility you have when you take control of your own Bitcoin. The device is replaceable. The recovery phrase is not. Anyone who finds it can instantly clone your wallet and drain it.
Common Mistakes That Cost Fortunes
Believe it or not, the biggest threat to your Bitcoin usually isn't some elite hacker halfway across the world. It’s often a simple, avoidable mistake in how you store your recovery phrase. So many newcomers make the same critical error: they treat it like just another password.
Here are the digital traps you absolutely must avoid:
- Screenshots: Never, ever take a picture of your recovery phrase. Your phone's gallery is probably synced to the cloud, creating a permanent digital copy that’s just waiting to be found in a data breach.
- Email or Cloud Storage: Don't even think about emailing the phrase to yourself or saving it in a text file on Google Drive, Dropbox, or iCloud. These services are constant targets for hackers.
- Password Managers: While they are fantastic for website logins, storing a seed phrase in a password manager is a bad idea. If the manager itself is ever compromised, your master key is exposed.
Security Alert: Your recovery phrase should never touch any internet-connected device after its initial setup. The second it’s stored online—in any form—you've created a permanent vulnerability.
Building a Resilient Physical Backup
Since keeping a digital copy is completely off the table, the only real solution is to create strong physical backups.
Writing your phrase on paper is the most basic first step, but paper is incredibly fragile. It’s easily destroyed by fire, water, or just deteriorates over time. You need something more permanent.
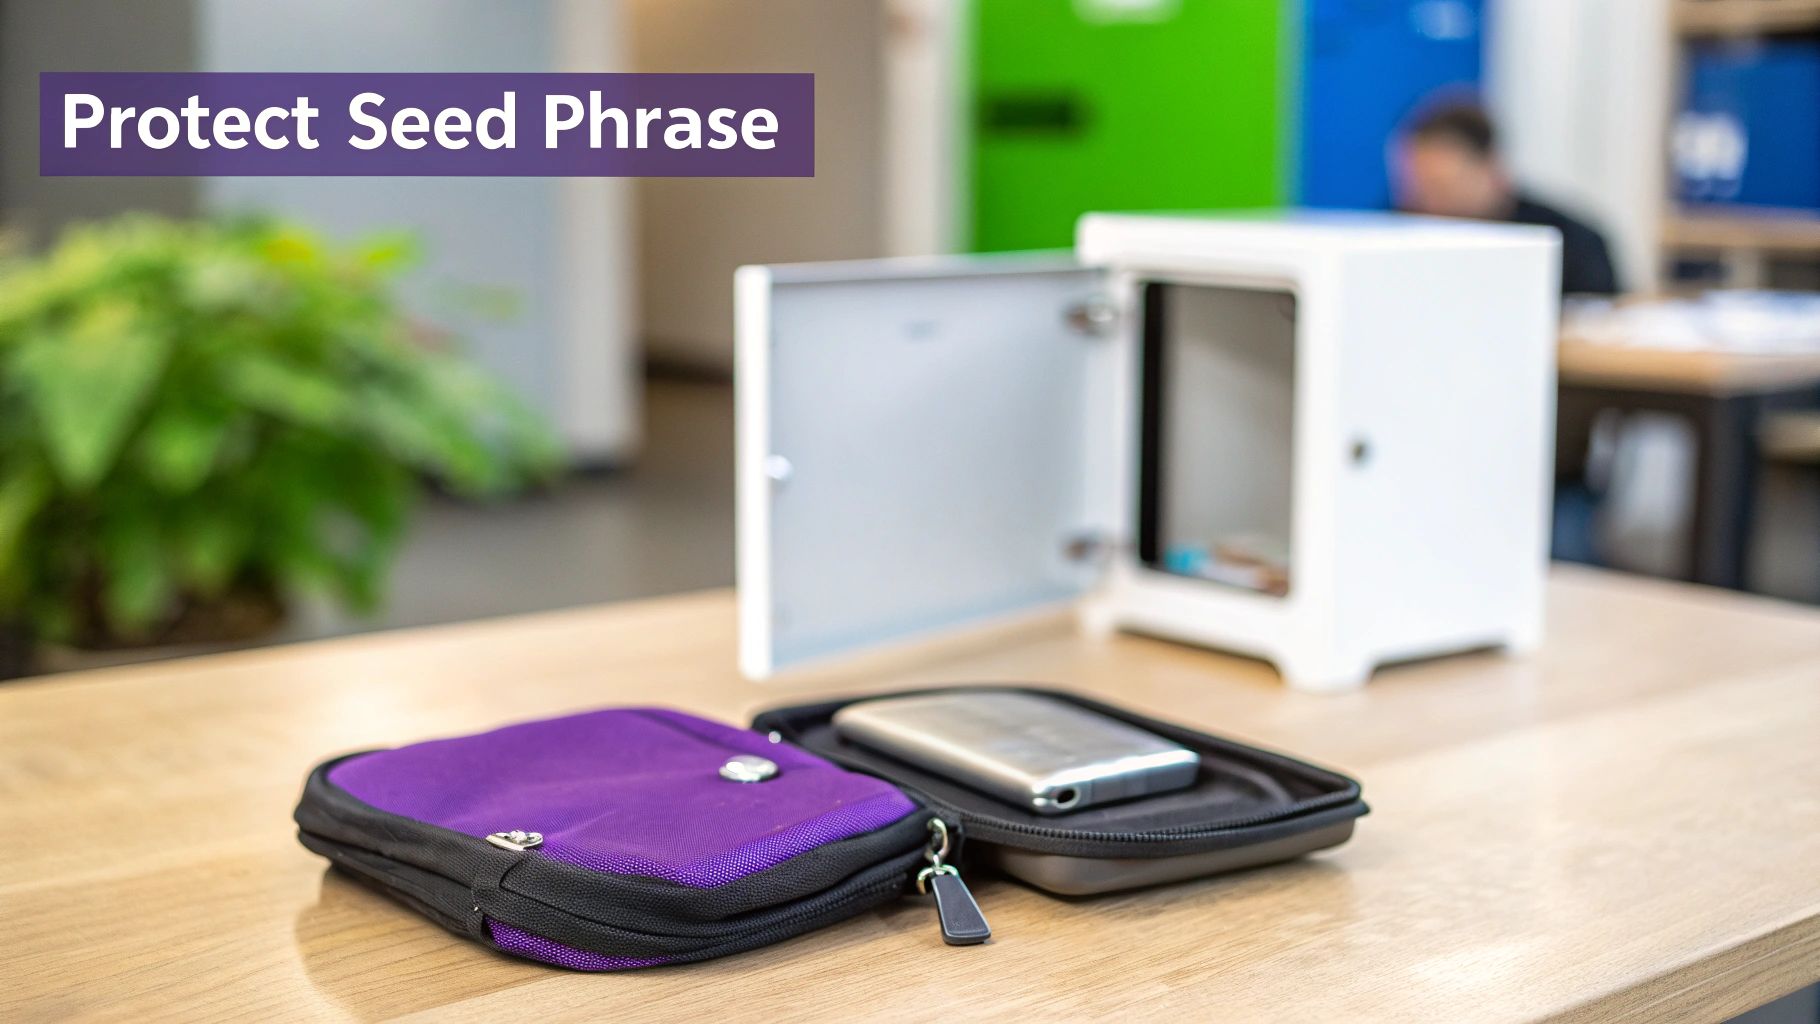
Robust Physical Storage Methods
- Steel Plates: Companies like Cryptosteel and Billfodl sell small metal plates and punches that let you stamp your recovery phrase into stainless steel or titanium. This makes it virtually indestructible—resistant to fire, water, and corrosion. It's a one-time investment that buys you incredible peace of mind.
- Fireproof Bags: If you must use paper, at least store it inside a high-quality fireproof and waterproof document bag. This adds a crucial layer of protection against common household disasters.
- Multiple Locations: This is key. Don't keep all your backups in one place. Store them in at least two secure, geographically separate locations. A fireproof safe at home and a safe deposit box at a bank is a classic combination.
This strategy creates redundancy. If one location is ever compromised or destroyed, you still have a way to recover your funds. For a deeper dive into wallet protection, our guide on how to secure your crypto wallet covers even more layers you can add to your setup.
Advanced Security Strategies
For those holding a significant amount of Bitcoin, you might want to look into more advanced techniques.
One popular method is called Shamir's Secret Sharing, which allows you to split your seed phrase into multiple "shards." For example, you could break your 24-word phrase into three separate shards and configure it so that any two of them are required to reconstruct the full phrase.
This way, if one shard is lost or stolen, your funds are still safe. It protects against both theft and accidental loss, but be warned, it adds a lot of complexity to your setup. This is generally for more experienced users who fully understand the risks. For most people, a well-protected steel plate in a secure location is more than enough.
Funding Your Wallet and Making a Transaction
Okay, you've got a secure wallet. Now it’s time to actually use it. An empty wallet is just potential; adding some Bitcoin is what brings it to life and lets you plug into the network. This usually means moving Bitcoin from an exchange—where most people buy it—into the personal wallet that you and only you control.
First things first, you need your wallet's receiving address. Think of it as your Bitcoin account number. Just open your wallet app, find the "Receive" button, and tap it. You'll see a long string of characters and a QR code. This is your public address, and it's completely safe to share with anyone sending you Bitcoin.
Moving Bitcoin From an Exchange to Your Wallet
Most people get their first taste of Bitcoin on a crypto exchange like vTrader. The process is pretty simple: you create an account, connect a payment method, and buy some BTC. But when you do this, the Bitcoin sits in your exchange account, which is a custodial wallet. The exchange holds the keys.
To take true ownership, you need to withdraw it to your own wallet.
Here’s how that typically plays out:
- Start the Withdrawal: Log in to the exchange and find the "Withdraw" option for Bitcoin.
- Enter Your Address: Carefully copy the receiving address from your personal wallet and paste it into the withdrawal field. Always double-check the first and last few characters to make sure it's an exact match. One wrong character and your funds could be lost forever.
- Enter the Amount: Decide how much Bitcoin you want to move.
- Confirm: The exchange will probably ask for a two-factor authentication (2FA) code or other verification to finalize the transfer.
Once confirmed, your Bitcoin is on its way. The transfer can take anywhere from a few minutes to over an hour, mostly depending on how busy the network is. Taking this step is essential for anyone serious about self-custody. For a deeper dive, you can read our complete guide on how to buy Bitcoin safely, which walks you through everything from purchase to withdrawal.
Understanding How to Send a Transaction
Sending Bitcoin is just as straightforward, but you need to get familiar with transaction fees. These are small payments, also called "miner fees," that you include with your transaction to pay the miners who validate and add it to the blockchain.
The fee you choose directly affects how fast your transaction gets processed. A higher fee gives miners an incentive to pick your transaction out of the queue first. A lower fee might mean you're left waiting. Most modern wallets are smart enough to suggest a good fee based on current network congestion, but many also let you set it manually.
Key Insight: A classic beginner mistake is setting the fee too low to save a few cents, only to find the transaction is stuck in limbo for hours. If a payment is time-sensitive, it's always worth paying the recommended fee or even a little more.
Let's say you want to send 0.0005 BTC to a friend. You'd simply open your wallet, hit "Send," and either paste their Bitcoin address or scan their QR code. After you input 0.0005 BTC, the wallet will show you the recommended miner fee. You review the total amount, confirm, and that's it—the transaction is broadcast to the network.
This ease of use is fueling incredible growth. The crypto market cap recently sailed past $4 trillion, with a 20% year-over-year jump in mobile crypto wallet users. Bitcoin continues to lead the charge, pulling in over $1.2 trillion in fiat inflows in just one 12-month period. You can dig into the data by checking out what a crypto airdrop is and how to safely grab free tokens.
Answering Your Bitcoin Wallet Questions
Stepping into the world of self-custody always brings up a few "what if" moments. It's totally normal. Getting the hang of managing your own Bitcoin wallet is a journey, and the best way to build real confidence is by asking questions.
Let’s tackle some of the most common ones that come up for newcomers. The idea here is to give you straight, practical answers so you can move forward with less guesswork.
What If I Lose My Phone or My Laptop Dies?
This is probably the number one concern, and for good reason. What happens if your phone takes a swim or your computer gives up the ghost? The short answer: your Bitcoin is perfectly safe, as long as you have your recovery phrase backed up properly.
Your coins don't actually live on your phone or laptop; they exist on the Bitcoin blockchain. Your wallet is just the key that lets you access and manage them.
So, if your device is lost or broken, the process is simple:
- Grab a new device.
- Download the same wallet software you were using.
- Look for an "Import" or "Restore" option and carefully enter your 12 or 24-word recovery phrase.
Just like that, your wallet reappears—complete with your full balance and transaction history. This is exactly why we say the physical backup of your phrase is the real treasure. The device is disposable. The phrase is everything.
Can I Have More Than One Bitcoin Wallet?
Absolutely. Not only is it possible, but it’s a smart security habit that most seasoned crypto users adopt. You can create as many wallets as you want, and using them for different purposes is a fantastic way to organize your funds and minimize risk.
It's a lot like how you manage traditional money. You probably have a checking account for daily expenses and a savings account for your long-term goals. You can set up the same system for your Bitcoin.
Here's a popular strategy:
- A Mobile Wallet: Keep a software wallet on your phone for small, everyday amounts. Think of it as your digital cash for coffee or online purchases.
- A Hardware Wallet: Use a dedicated hardware wallet to store your long-term savings—your "HODL" stack. This stays offline and secure.
This compartmentalizes your funds. If your phone were ever compromised, only the small amount in your mobile wallet would be at risk, while your main stash remains untouched and secure in cold storage.
What's the Difference Between an Address and a Private Key?
This is a fundamental concept that can feel a bit confusing at first. The easiest way to think about it is by comparing it to email.
Your Bitcoin Address is like your email address. You can share it with anyone, anywhere, without worry. It’s how people send Bitcoin to you. It's public.
Your Private Key is like your email password. It's the secret credential that proves you own the funds and gives you the power to spend them. You should never share your private key with anyone. Ever.
Thankfully, modern wallets handle all the complicated key management for you behind the scenes. Your main responsibility is to protect that recovery phrase, which acts as the master key to all the private keys your wallet ever creates.
How Much Does It Cost to Create a Bitcoin Wallet?
Here's one of the best parts about taking control of your own crypto: for most software wallets, it costs absolutely nothing.
You can download trusted mobile and desktop apps like BlueWallet, Muun, or Electrum from their official websites and set up as many wallets as you need for free.
The only costs you'll run into are:
- Network Fees: When you send Bitcoin, you'll pay a small transaction fee to the miners who secure the network. This fee doesn't go to the wallet developer.
- Hardware Wallets: If you decide to upgrade to the top-tier security of a hardware wallet, you'll need to buy the physical device. They typically run from $60 to over $200, which is a one-time investment in serious asset protection.
For anyone just starting out, a software wallet provides a powerful, secure, and completely free way to begin your self-custody journey.
Ready to take the first step with a trusted platform? With vTrader, you can buy Bitcoin instantly and withdraw it to your new wallet with zero commission. Start building your portfolio today at https://www.vtrader.io.

Steve Gregory is a lawyer in the United States who specializes in licensing for cryptocurrency companies and products. Steve began his career as an attorney in 2015 but made the switch to working in cryptocurrency full time shortly after joining the original team at Gemini Trust Company, an early cryptocurrency exchange based in New York City. Steve then joined CEX.io and was able to launch their regulated US-based cryptocurrency. Steve then went on to become the CEO at currency.com when he ran for four years and was able to lead currency.com to being fully acquired in 2025.